Warning: This is possibly the longest post I have ever done, or ever hope to do!
Loads of pictures. I am not responsible for eye fatigue. Just so's you know.
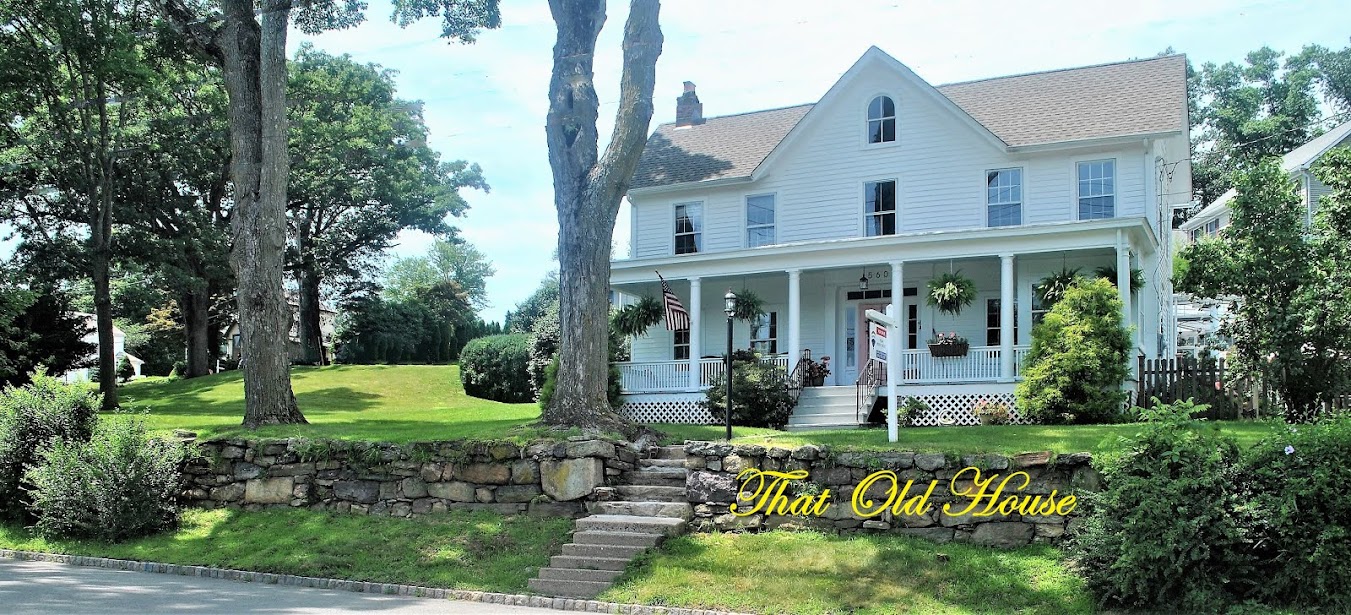
Back in the day, That Old House was a farmhouse.
Ipso facto, it had a farmhouse kitchen.
But three-and-a-half years ago, when we bought this house, this is the kitchen we got:
 |
| That's our conservatory, or sunroom, on the right. |
It was quite new, this kitchen, but it was done in 1980s style.
Oak cabinets. Brass knobs. Dark green laminate counters with wood edge trim.
Even one of those white faucets to match the double enameled cast iron sink.
(Here it is, in use, so please excuse the mess.)

Whoever invented double sinks never had to wash a great big roasting pan,
a toddler, or a dog in the kitchen sink. Double sinks are useless. And this one was chipped.
The appliances were new and good quality. Problem: I can't cook on an electric stove.
I burn everything. Even water. This poor innocent cooktop was my sworn enemy.

We bought the house in March of 2008, moved into it that May.
For months, we discussed what to do about the kitchen.
Friends recommended drastic changes -- new cabinets, moving appliances, etc.
We decided to change what we could, and live with what would either
be too costly to change, or too disruptive. I didn't want to be without a kitchen for weeks on end.
Our first step, in November 2009 -- replacing the countertop, sink and cooktop -- was actually prompted by the faucet
beginning to leak. I didn't have to whack it too many times with the hammer to make that happen, either.
For the counter, we chose soapstone for its historic value, and its quiet look.
 |
| Templating for the countertop. |
 |
| Out with the bad counter .... |
 |
| And . . . |
 |
| In with the new counter! |
 |
| If you have soapstone installed, be prepared for this. We were not. What a mess, and we had company for dinner that night! |
 |
| I chose the biggest, deepest single sink I could find. It was a good price, online. Both sink and faucet, stainless steel. |
 |
| Having been used to 5 burners at our last house, we chose a 5-burner Thermador for this one. This, and the soapstone, were our only extravagances. |
Soapstone countertops, sink, and cooktop done.
Phase One of our kitchen makeover -- finis.
 |
| By the way, this part of the makeover was finished two days before Thanksgiving; we were hosting 27 people. |
Now we jump to May of 2010, 6 months after the countertop switcheroo.
And it's time to tackle The Isthmus.

The Isthmus was our nickname for a very large counter that projected 40-inches into the room.
Normal counters are 24-inches deep. At first, you think, "Hey, what a good work surface!"
That quickly changes to, "Hey, what a great place to dump stuff and make a sloppy mess!"
Its shallow shelves were pretty useless, as I couldn't reach them.
On one side, tall cabinets housed pull out pantry shelves. On the other side, twin cabinets housed double wall ovens.
Ideally we would have pulled out the ovens, moved them, moved the cabinets, have some custom open shelving built,
put the refrigerator somewhere along this wall, made the wall ovens easier to get to, put more stone or maybe marble counter,
and so on and so on . . . . but we'd need professionals to do that, and they cost a boat load of money.
We decided to do it down and dirty and cheap inexpensive.
I found an old hutch for sale in Pennsylvania (Craigslist) for $50.
It came apart. Here is the bottom of the old hutch, in our butler's pantry.
 |
| This guy's still waiting for his glamour makeover. He's gonna wait awhile. |
This was the top section of the hutch:

We wrestled it onto the Isthmus to see if it would fit. And it did. Eureka.

Yes, that does look awful, but wait! There's more!
Howard took out the rear cabinets from the Isthmus, and moved the normal-depth front cabinets back to the wall.

Time to make things happen.

Then we got out our trusty can of Ralph Lauren Bone Black semi-gloss, and painted
the base of the Isthmus cabinets, and the hutch top, with all the curvy shelves.

Off to IKEA we skipped, to get one of their amazingly cheap inexpensive butcher block countertops.
About a hunnert bucks. And let me tell you, that is way cheaper than soapstone, and I love it.
 |
| We couldn't center the hutch top, or it would have covered up our outlet and light switch. We didn't want to pay an electrician to move that, so -- we put the hutch to one side, leaving a small open section of butcher block as a breakfast-bar-for-one. It's a great coffee perch. |
This phase of the kitchen re-do also involved putting beadboard wallpaper
on the sink wall (thank you, Josh), and painting that white.

Ta-da! Phase Two -- finis!

Clearly, ours is a working kitchen, as evidenced in this picture, below,
taken while our daughter Anne was baking zillions of cookies for friends:

Fast forward to October of 2010.
After (again) months of discussion, we decided to
screw our courage to the sticking point, take the fateful plunge,
and paint the oak cabinets.
But Phase 3 really started with a dog named Kelly.
Now don't get me wrong; we love Kelly, who is an adorable English Cocker and belongs to Howard's sister.
Kelly visited us, and we are not quite sure what she ingested but she left a big orange whoopsy stain on our white sunroom carpet.
Thank you, Kelly, as we'd been looking for an excuse to replace that carpet, and ... you gave it to us.
Bless your little waggly-tailed doggy heart.
 |
| New carpet, old paint. |
Since we already had the furniture out of the room for the carpet laying, I said to my dear husband,
"Why don't we paint the sunroom?"
So we did. Twice. Because the first color was too white for a room that gets that much, well, sun.
At Sherwin Williams, a color called Biscuit called my name, and it was perfect.

We kept the bright white trim, but the walls were painted in the soft Biscuit color
-- an off-white, maybe a bit of gray in it -- well, whatever, I love this color.

I think my husband thought we were done. The innocent dear.
Unbeknownst to him, I'd found an inspiration picture in a book on kitchens.

What really caught my eye were not the dark countertops or the white cabinets -- seen those a bajillion times -- but that wallpaper. Toile wallpaper in a kitchen. I swooned. No, I didn't really, but I couldn't get that kitchen out of my wee little brain.
Since I am cheap thrifty, I found some wallpaper online at a terrific price. And I ordered it.

Black and white toile. And wouldn't you know? The background color pretty much matched our lovely Biscuit color paint.
Coincidence? Hmm . . . probably not. I have an envelope of wallpaper samples . . . .

And so, the painting of the kitchen, and the wallpapering of same, began.

It took weeks, because it's a whole lot of work to do this, and the wallpapering could only be done on
weekends when Howard was around; we are a team for papering. It is, by the way, the acid test of marriage.
Yes, the painting should be done before the papering, but I used Howard's time when I had it.
The painting I did during the week, on my own.
Phase 3 of the kitchen renovation began in mid-October. It didn't end until right before Thanksgiving.
I lost quite a few days -- weeks, really -- with my father being in and out of the hospital during that time.

Kitchen cabinets are time consuming. Trust me, they take way longer than you think they will take.
But they are so worth the effort! My only regret is that we waited so long to do this.
I had tables set up for cabinet door painting all over the place.

At least the door frames could stay where they were!

We decided to replace the brass knobs with oil rubbed bronze, and on eBay I found grape-patterned knobs that just delighted me; we have an ancient grape arbor here, and watching the grapes ripen is one of our spectator sports.

The doors took one coat of primer on each side, and then 3 coats of paint on the backs,
and 4 on the fronts, before I was happy with the way they looked. In this picture, they are done.

With the cabinet doors done, it was time to tackle the wall where the Isthmus used to live.
For that to happen, the big hutch top had to come down, all the china stowed elsewhere.

Howard, all ready and eager to get going!
Primer and a first coat -- already looking better!

Almost there -- the last wallpaper in the corner by the refrigerator is finally done. By this time, it was only 6 days until Thanksgiving.

The black hutch, nicknamed Jabba, has gotten new knobbies, too.
I found them on eBay, and thought they looked wonderfully old and Welsh-dresser-y.

Okay, you have suffered enough. Time for the end of this long, long journey
which began in November 2009, and ended 3 days before Thanksgiving in 2010!
This back section of That Old House is the "new" addition, built in the 80s. The 1880s.
We didn't want to recreate an 1880s kitchen, as who in their right mind would want to work in one of those?
But we wanted our kitchen to look less new, less 1980s, and more in keeping with the rest of this old home,
as if it had just sort of grown up over time, rather casually.
It is way far away from perfect, and there were a load of compromises along the way.
To paraphrase former NYC Mayor Ed Koch, "How'd we do?"
 |
| I don't like those can ceiling lights, but for now -- leaving them was the thrifty choice. And they work. |


 |
| Real moment -- laundry waiting to go upstairs. |

 |
| Would you believe I still haven't reattached that missing bit of molding to the left of the stovetop? It's a two person job -- one to hold, one to glue. Maybe this weekend? |

And that's about it.
You must be exhausted.
Come on into the kitchen -- I've got a nice bar stool now for you, not a tiny school chair -- and I'll put the coffee on!

Link Parties!
LaurieAnna's Vintage Home is sponsoring a new meme -- Farmhouse Friday. Click here!
At My Romantic Home, it's Show And Tell Friday. Click here!
It's Furniture Friday at Miss Mustard Seed's blog. Click here!
It's Furniture Friday at Miss Mustard Seed's blog. Click here!
It's Feathered Nest Friday at French Country Cottage. Click here!
The Charm of Home features Home Sweet Home on Fridays. Click here!
It's Vintage Inspiration Friday at Common Ground. Click here!


Have a lovely weekend, my friends. We are homebound this weekend, too many chores! -- Cass


I like it! You did a great job. Our kitchen looks like it was redone in the 1970's. It has scary wallpaper that isn't in very good shape.
ReplyDeleteIt is on the list of things we are going to do something about, but it is not on the vital list so it will have to wait. Thanks for the inspiration though, I really like your kitchen.
Kat
How'd you do ? I think you and your husband did a great job on your kitchen renovation ! I have enjoyed seeing all your posts about the process - Great job you two !
ReplyDeleteEnjoy your weekend.
I've seen some of this before but it is delightful to see it again. What is it that we love so much about make-overs? (must be that sick need to accomplish something). I love all of it. Would love to cook there and envy that gas stove though it's been y e a r s since I cooked on one. Also I can't see where you need to put back the trim near the stove! After the work of this post you should take the rest of the weekend off!
ReplyDeleteHave a good one,
dotsie
Cass, you and your husband did a fantastic job. Your kitchen is very nice and I love the sun room. I'm glad you told how you painted the cabinets because we are wanting to paint ours but have been afraid to do it. Yours look very nice.
ReplyDeleteHave a restful weekend!! Shannon
I have been considering sandstone. Do you have any regrets? Pros/Cons? I like the non glossy look over granite. Do you go to the same people to find it? Lowes/Home Depot? or granite guys?
ReplyDeleteCass, what a great job you did! Bravo! Completely transformed, airy, full of light - must be a joy to work in.
ReplyDeletexo
Claudia
Brat - that kitchen is to die for! I'm soo jealous. Our's not so much, but it sure does get a work out!
ReplyDeleteEnjoy your weekend!
Leann
I have so enjoyed watching your kitchen become a beautiful room....I am on my way, I like cream and sugar please....lots of sugar! We have lots to talka bout! :):) Sandy
ReplyDeletewhat an amazing difference. Love the toile. I think you have done it. Richard from My Old Historic House.
ReplyDeleteHi Cass! I love your kitchen and remember going through the reno - well, sortof, with you. What a difference the white paint makes on your cabinets and your Jabba, oh, what wonderful storage you have there! Now where is little Dion? :) I'll have my tea with some sugar and cream please!
ReplyDeleteBe a sweetie,
Shelia ;)
You and Howard are an impressive team. Painting kitchen cabinets is not for the faint of heart. Our old house did not have a kitchen in 1972 when Joe bought it. He says it must have been on an attachment that fell off! The kitchen we have now needs to be blown up as there is not enough money to redo it properly. That's why we prefer the little vacation house. I love your wallpaper but I never want to see any here again:-)
ReplyDeleteWhat a beautiful transformation, Cass. I would love to spend time in this kitchen. Great job!
ReplyDeleteI made it all the way through and I love it...
ReplyDeleteYou're right about papering...we've done it and we've survived but it is stressful on a marriage....
Mama Bear
Looks like a home you can REALLY enjoy living in. Wishing you many happy years in this house.
ReplyDeleteI just love your house and your kitchen is absolutley stunning. I can't believe how creative you are. It looks wonderful.
ReplyDeleteThanks also for the info on the doggie paintings that I found. I didn't know anything about them, except I liked them. Hugs, Marty
O Cass! What a delightful transformation! I simply adore the wallpaper. I do not normally like wallpaper but That seems fairly timeless, which is my problem with most papers.
ReplyDeleteAlso I have a jar exactly like the one you have on the Jabba the hutch filled with flour too. :)
Loved your journey. I cannot imagine that this post will not be inspirational for so many who want to paint their cabinets and are afraid too. I remember the first stroke of paint that went onto my cabinets. I was scared I was making a mistake. I have since painted them once more (when I realized it was just paint) and now two and a half years later I am getting ready to paint them again. LOL Loved the end result. How'd you do? You did good! :)
ReplyDeleteI love it! You guys put so much work into it and it looks beautiful! I loved your cute stories as you went through the renovation! Mine still isn't finished, will you please come over! Great job!
ReplyDeleteWow! That is awesome! I am very impressed with how it all turned out. So worth the effort you two put into it. I am sure you are really enjoying your kitchen now. :)
ReplyDeleteCass- I have been following along with you since I first found you. Wow! You've come a long way, Baby! It looks great--and you did a great job working with what you had and spending on what you really love! Great job!! Did I tell you GREAT JOB? xo Diana
ReplyDeleteWow what a fantastic job! Seriously inspiring!!
ReplyDeleteLove your style Cass......always wanted an old farmhouse and I love how you've made your so precious.That wallpaper is absolutely GORGEOUS!!!Blessings~~Shine
ReplyDeleteLike everything else in that old house - it's lovely ! I can't believe you've only been there a few years, it looks like a home that you've tinkered and aged to perfection !!! It's definitely more "finished" than Lavender Hill and we've been here 23 years....
ReplyDeletehope you're doing ok in this weather - did you get that whopping storm this afternoon ?
gena
I love it, Cass! It is a kitchen that is loved, loved in and used :) I cannot stand a kitchen that is just for show...the kind I grew up with. LOL!
ReplyDeleteJust beautiful :)
xo, misha
It turned out beautiful! I love the black hutch. great remodel. Thanks for linking it to Home Sweet Home!
ReplyDeleteSherry
Transformação maravilhosa!
ReplyDeleteNever seen this before...so beautiful and look gorgeous.
ReplyDeleteWhat a great job! Your kitchen looks fabulous! I love the black accents and the way you made that isthmus area work for you.
ReplyDeleteWhat paint brand and color did you use on your cabinets?
I'm having serious hutch envy right now. Your hutches are lovely and filled with lots of goodies.
This comment has been removed by the author.
ReplyDeleteThis comment has been removed by the author.
ReplyDeleteWhat a lovely kitchen; so creative!! Nice job. Especially love the soapstone.
ReplyDeleteWould love to know where you found the wallpaper. Can you share a link for the site?
In search of style and durability, most homeowners will choose granite for their kitchen countertops. On the other hand, stone countertops for example granite are nearly impossible to acquire for those with a low budget.
ReplyDeleteHi Cass, I know how hard you Both worked on your kitchen because my husband and I have done it also. It's a beautiful space. Love your blog, I'll be back. I haven't posted anything yet, because I'm new to blogging.
ReplyDeleteLooks fabulous.. We're in the process of doing the same thing to our 125year old kitchen( Ha Ha)..Hope it turns out as beautiful as yours... Hugs
ReplyDelete